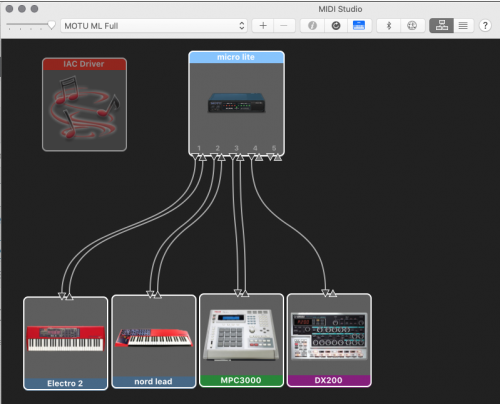
Setup MIDI Keyboard
To set up your keyboard to send and receive MIDI you will need to synchronize Logic to your keyboard.
1. Create a virtual mirror of your MIDI keyboards in the Audio MIDI Setup application found in your HD > Applications > Utilities
2. In Logic go to File > Projects Settings > Synchronization
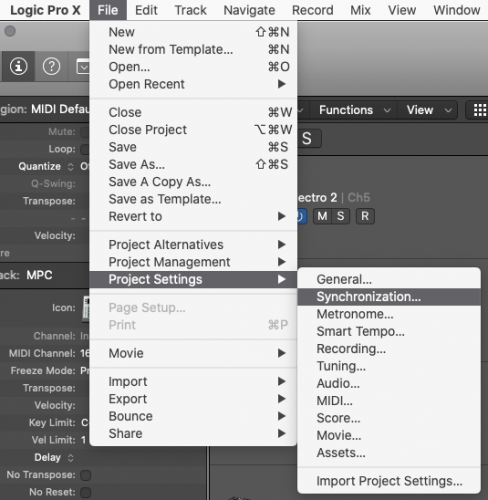
3. Select the MIDI tab
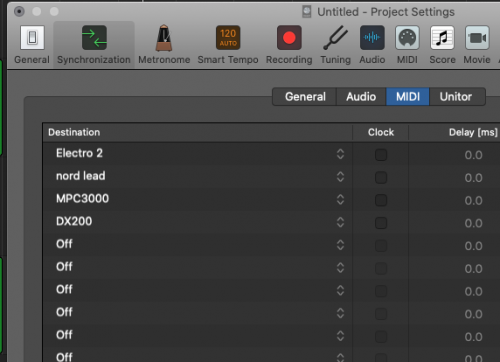
4. In the Destination list manually select the keyboards that you defined with Audio MIDI Setup
Automation
The A key toggles Automation view.
Automation Event List
To set exact numeric values to automation such as volume use the Automation Event List.
For some reason, Logic has hidden access to the Automation Event List window leaving it only accessible via key-command.
The default key is Command-Control-E.
1. More than 1 region must be selected before using Command-Control-E.
NOTE: The widow is extremely volatile and will switch to a floating List Editor if you deselect the regions.
Close the compromised window, select the regions again, and applying Command-Control-E.
2. The settings are essentially MIDI events, rather than 0-100 the range is 0-127.
3. The Value for a Volume of 0db is 90.
Copy Automation
1. Set the Locator to 0 and select the track to copy from.
2. Change to the Automation Select Tool and copy desired Automation Points.
3. Select the track you want to apply automation and paste using the Automation Select Tool.
Track Automation VS. Region Automation
If you set automation a part of the song that will be moved around or copied, use Region Automation.
If you are automating a fixed part of the song, perhaps a fade at the end, use Track Automation.
Track and Region automation can be moved or copied between the two by right-clicking the desired region(s) and setting the Automation parameters, found near the bottom of the contextual menu list.
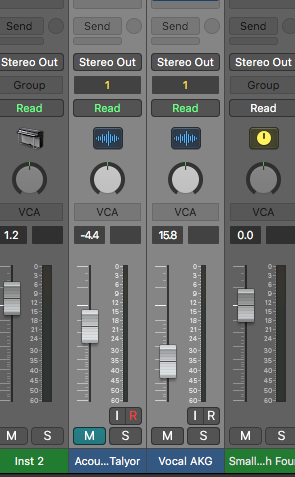
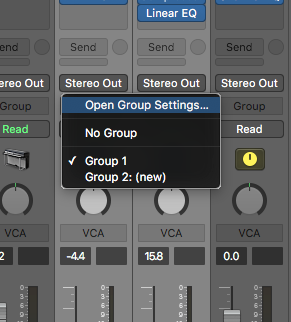
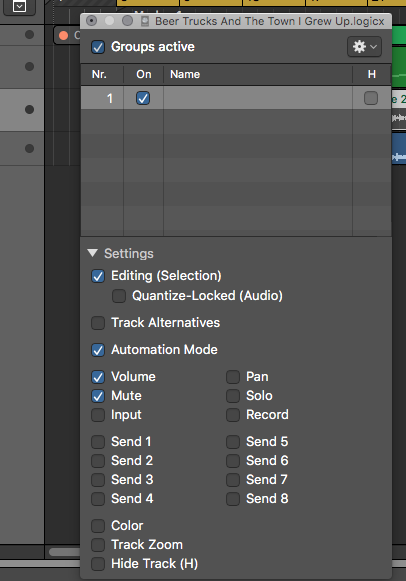
Tracks
Group tracks on the Mixer to edit multiple Comp Takes
Note: All track Takes MUST be the same length to be effectively added to a group.
1. Open the mixer and select desired tracks for the group.
2. Add tracks to an existing group or add a new group (up to 32).
3. Open Group Settings. Confirm the desired group is active and select Editing (Selection).
Takes Folder Quick Swipe
Use Option Q to toggle between Scissors and Quick Swipe on a selected Takes folder.
Zoom Tracks
The Z key will fit the selected tracks to the window or fit all tracks to the window if no tracks are selected.
Make ALL Tracks the Same Height
Click between 2 Track Headers holding the Shift key to make all tracks the same height.
Track height is based on the Vertical Auto Zoom button on the top right.
Import Tracks and Track Settings from another Project
Go to File>Import>Logic Projects… and locate the Project that has the track information you want to add to your current Project.
Select the checkbox for the settings of each track you want to import.
Click the Add button.

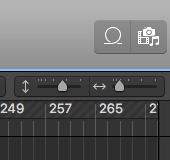
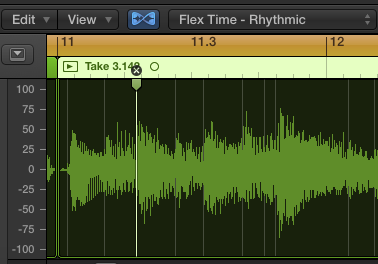
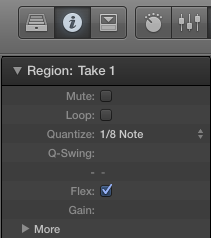
Time Stretch
- Get the 1 on the 1.
- Open the Editor for the desired track.
- Click on the Flex button and select a type. Start with rhythmic.
- Open Inspector column.
- Under Region: MIDI Thru set Quantize to 1/4 notes. This is a good starting point.
- If anything sounds off open the track’s Editor window and adjust the Flex Hit Points by selecting and moving the Hit Point or turning the Hit Point off by clicking on the X at the top of the point.
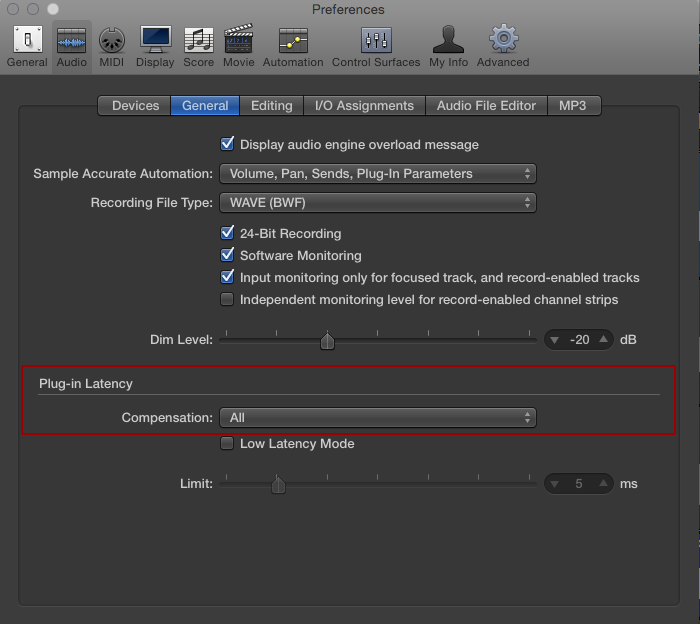
Get Drummer to play along
If Drummer is off time you may need to turn on Plug-In Latency.
Open Logic Pro>Preferences>Audio>General in the middle of the window is Plug-in Latency and confirm if Compensation is enabled.
NOTE: This is a universal preference. If you use Drummer on other songs recorded without Latency Compensation this will effect them and therefore should be turned off until adjustments are made to the audio placement.